
Update June 2024: How could I overlook the option to install/update RetroArch via Homebrew for such a long time? Added a small chapter in the Initial Setup chapter below.
Update June 2024: Some small, but great RetroArch news considered here. First, HDR screenshots work now! And the new function "Add To Playlist" is such an important usability improvement of RetroArch Playlists. Last section "Other Arcade Cores" also updated.
February 2024: so finally the RetroArch Tutorial Part II is out, but please be sure to have gone through this Part I first 😊
21 April 2023: Added a short section as regards the Steam version of RetroArch.
20 March 2023: RetroArch 1.5.0 a.k.a. ‚The MacOS Release‘ (just kidding) was released - it is a huge improvement for Macs - https://www.libretro.com/index.php/retroarch-1-15-0-release/ and everything in this article also applies to the new stable build. I have not tested the Steam version, though because updating the newest Nightly manually is very convenient on MacOS, as also described below.
About this posting: As the new Vulkan driver for MacOS is a game changer for Retroarch in MacOS, it became necessary to update this entry. Don't be too afraid of this lengthy article, it's a checklist of what RetroArch is capable of, and the result of this work is an unmatched gaming experience, even in old-school arcade games.
INITIAL SETUP
| You need the latest RetroArch_Metal.dmg from this place. |
The ~Library or $HOME/Library directory is a hidden directory in your User directory: press command+shift+. - and all hidden directories appear, including the Library directory in your user directory. Drag this folder it into the Finder Favorites on the left, so that it's easily accessible. You‘ll need it quite often (also useful for other app settings).
Move away old RetroArch Preferences: Can be very important if you screwed up earlier! Prior to installing and running a new RetroArch version, consider backing up/deleting from here previous preferences. They are located in ~youruser~/Library/Application Support/RetroArch (just rename the entire directory for the time being).
Install RetroArch into your Applications directory. Run it for the first time, and it will create a new directory in ~Library/Application Support
Recommended: Install via Homebrew
If you have Homebrew up and running, installing and keeping RetroArch up to date seems the most convenient option for me. It also allows you to keep the RetroArch stable and the nightly build side by side, which I also find very convenient.
Stable build: brew install --cask retroarch-metal
Steam Version
I installed the Steam version of RetroArch on my Mac for testing purposes (with quite some hesitation, as I otherwise do not use Steam). There are some interesting differences between the Steam version and the Standalone version:
You are buying these add-ons with quite some additional software (e.g. all three shader types are bundled, you get a certain selection of cores pre-installed) let alone the logon to Steam. All in all, I clearly prefer RetroArch standalone for the time being.
CHECK: Vulkan driver as default


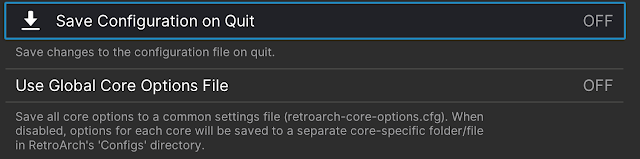
Why? With the default setting turned ON, everything you try out in the settings is saved once you quit RetroArch. As you configure a lot in RetroArch, mistakes will happen. In such cases, I am personally better off if I can just quit RetroArch and discard all changes that I have not saved manually. Of course you then must not forget to manually save configuration changes prior to exit RetroArch. Your choice.
From now on: Manually save any new configuration step (in Main Menu/Configuration File) – including the previous step! Otherwise you‘ll loose it at quit.

JOYPAD CONFIGURATION
Many joypads work out of the box, but you need to be sure about it. All navigation is best done with the joypad. Besides an impeccable binding of your joypad controls, check the following:
Recommendation: Swap OK and Cancel (in Settings/Input/Menu Controls)

Really a matter of taste. Most of the in-game controls, including those of FinalBurn Neo, have DOWN as OK/Button 1 and RIGHT as CANCEL/Button 2. That’s why I prefer to swap it in RetroArch as well.
Optional: Set Menu Toggle Controller Combo (in Settings/Input/Hotkeys):

This is very important in order to (i) configure very important settings in the Quick Menu (below) and (ii) to safely exit Cores in any state. Choose between the available options (joypad left/right). I prefer L1 + R1, as it hardly comes into your way during gaming - but it may not be totally convenient for you with some cores that make use of L1 and R1, such as PS1 and N64.
In very recent Nightly Builds, the joypad PS4 Home Button finally works in MacOS - and of course this button suits perfectly for switching to the Quick Menu.
Be sure that your Port1 Controls work perfectly!
Suggestion: Bind Analog Control to Digital Control (in Settings/Input/Port 1 Controls)

The consequences of this setting are nicely described, but as long as you do not need an analogue stick, it is easier to play, at least I do not play with the D-Pads of my PS4 controller. For single games, you can disable here during a game (remember: Menu Control set above).
ENABLE HDR (if available for you)

I recommend checking the HDR default settings because HDR monitors seem to vary sigificantly. In my case, these settings work far better than default settings:
Peak Luminance: 450.x (<- this setting should match with the peak luminance of your monitor)
Paper White Luminance: 80.0x
Contrast: 5.00x
Expand Gammut: OFF
In my case HDR gives a visible benefit, even when playing very old school games, thus highly recommended.
Update June 2024 - a long-lasting bug is fixed now: HDR-screenshots from within RetroArch now work! As you trigger screenshots from within the Quick Menu, this is the perfect way to properly time your sceenshots.
ONLINE UPDATER (in Main Menu/Online Updater)
Only after perfect joypad configuration, head for the Online Updater. Things to update – basically all of those, most importantly the Core Info Files, the Assets, the Databases and the Slang Shaders:

Then download the Final Burn Neo Core (in Main Menu/Online Updater/Core Downloader):

CONFIGURATION: Game Directory (in Settings/Directory)

You will save a lot of time if you point RetroArch to your game directory, otherwise you need to go down from the root directory all the time.
FIRST START OF FINALBURN NEO (in Main Menu/Load Content/Start Directory)
Only now you can do your first start into FinalBurn Neo, best by choosing one of your favorite arcade games. Expect no glorious picture, as no shaders have been set so far. |
| Looks mediocre without shaders |
FURTHER SETUP FROM WITHIN A RUNNING GAME (in Main Menu/Quick Menu)
Make friends with the Quick Menu! One of the peculiar things in RetroArch is that some important settings can only be done from within a running game. These settings will still apply to all games, unless you decide differently. By pressing the Menu Combo (configured above); you get into the Quick Menu of RetroArch, where all the following settings can be configured.
Always remember: Without a running game, the configuration of the Quick Menu is not available.
Quick Menu - Shaders
Set a nice and easy CRT Shader (in Main Menu/Quick Menu/Shaders):
After setting Video Shaders to ON, also set Remember Last Used Shader Directory to ON.
 |
| Once you turn Video Shaders ON, you load a shader preset |
Load a Shader Preset in shaders_slang/CRT – for a change, try crt-easymode-halation.
Briefly switch back to the game and see whether it works.
If you like what you see, go back into the Menu and head for Save/Save Core Preset. By this, all games run by FinalBurn Neo run this shader.
 |
| Save Core Preset is the nicest option for the beginning |
Don’t get lost in all these different shaders. Good reliable shaders are of course CRT-GEOM and the deluxe variant.
As soon as you get accustomed with shaders, you might consider trying out the real thing: my Arcade Bezels with the koko-aio shader. Already the stock version of koko-aio is best in town.
Latency Settings - Preemptive Frames / Run- Ahead
(alternatively in Main Menu/Quick Menu/Latency)
In the RetroArch Nightly Builds, Preemptive Frames come as a new options for reducing latency. The RetroArch team recommends to use Preemptive Frames whenever possible. For me, this works flawlessly in RetroArch - 1 frame just like in the Run-Ahead option.

You may save this globally (under retroarch.cfg) or for the specific core (as Core Override - in Quick Menu/Overrides/)
 |
| Saving as Core Override means that the Latency Setting only applies to this Core - FinalBurn Neo in our example. This might be convenient. |
Should the game audio crackle in your system, try Run-Ahead instead of Preemptive Frames (but do not use the Second Instance for FinalBurn Neo):

In my tests, 1 Frame Preemptive Frame/Run-Ahead is very nice for FinalBurn Neo. I did also not experience any audio issues so far.
With the Preemptive Frames/Run-Ahead feature of RetroArch, you get very snappy gaming experience with zero latency. With newer versions of FinalBurn Neo, also highscores start working together with these settings. Where hiscores do not work, consider as Save State (unless you play in the Hardcore Mode of RetroAchievements, where Save States are forbidden).
Hiscore Support in FinalBurn Neo
It's another great development that hiscore support gradually arrives in FinalBurn Neo, even if you have Preemptive Frames/Runahead enabled. There are two prerequisites:
- Hiscore support must be enabled in the FinalBurn Neo core options (it's enabled by default)
- You must manually download the hiscore.dat file in Main Menu/Online Updater/Core System Files Downloader
You can easily check whether it works with 1942 or 1943. If hiscore works with some games but not with others, the game itself probably does not yet support it. It's always an alternative to save a Save State (again, unless you play in the RetroAchievement Hardcore Mode, where Save States are not allowed).
VIDEO CONFIG (new): Force 60 Hz (Quick Menu/Core Options)


While all other default video sync options seem ok for arcade games, this one seems to further help in reducing latency. You can also choose this feature alone for reducing latency if you do not want to head for the Runahead feature described before.
This very new feature is described in this article very nicely.
ALTERNATIVE VIDEO CONFIG: No Automatic Frame Delay, but Max swapchain images reduced to 2
With the "Force 60 Hz" Core Option of FinalBurn No, the following is virtually irrelevant, but I leave this legacy information here:
If your scrolling shows some micro-stuttering and you have (like me) a Fixed Refresh Rate Monitor running at 60 hz, you can only achieve acceptable results, which never will be optimal. Warning: If you look for this in the Internet, you get hundreds of best combinations, it's not an easy thing to choose, and this is my best guess.
These are the topics you need to closely look into:
Settings/Video/Output/Estimated Screen Refresh Rate: let Retroarch run until you reach 2048 samples, then the deviation should be below 3.5%, press RETURN to transfer this refresh rate to the Vertical Refresh Rate setting above
Settings/Video/Synchronization/Automatic Frame Delay - OFF
Settings/Video/Synchronization/Max swapchain images - 2
Why? Frankly I do not know, but that seems to be my best settings for acceptable scrolling.
Compared to this, the output on a 144 Hz GSync gaming monitor is impeccable, no micro-stuttering at all. There you just head for one option:
Settings/Video/Synchronization/Sync to Exact Content Framerate (GSync, FreeSync) - ON
And you are set and done.
Setup of RetroAchievements
As a huge fan of RetroAchievements, its setup is mandatory for my basic RetroArch setup. Desribed here in detail.
CREATE A PLAYLIST (in Import Content)
Although you can start each game manually via the “Load Content” Command, it is nicer to create a RetroArch Playlist. I tend to set up this playlist rather slowly by adding individual games → Scan File. If you scan an entire directory, you get all game clones in, and that’s then not much difference to the Load Content command.

In Playlists, you then assign each game to a Default Core. Later on, you can also Reset the Core Association or set a different one.

MANAGE YOUR PLAYLISTS (Update June 2024)

Note: It seems that the "Add to Playlist" option is not visible by default. If this also happens to you, head for: Settings/User Interface/Menu Item Visibility/Quick Menu -> and enable "Show 'Add to Playlist'. I have no idea whether this seems to be set off by default.
You can find this in two places: Either in the Playlist Entry of the game or in the Quick Menu when you run the game. As the name indicates, it allows you to copy the entry to another Playlist. That's just perfect to consolidate different Arcade Playlists within one.
As explained above, the Playlist Entry does not decide which core you run:

Via "Set Core Association", you tell RetroArch which core to launch by default. The Playlist is irrelevant for this setting.
Congratulations: You are now basically set to enjoy arcade games with FinalBurn Neo!
Upgrading
Upgrade RetroArch: As long as you are fine with your current settings, you can just download and install a new version of RetroArch. As all your cores and settings are located in ~/Library/Application Support, nothing will be deleted. If you are unsure, just move this directory away and start from scratch. You can then also migrate manually, most importantly playlists or other very individual settings.
Upgrade FinalBurn Neo Core: From the Online Updater, you can update FinalBurn Neo to the latest Nightly Core (and this is what you download via the Online Updater). May I also note that FinalBurn Neo has been very stable for months now. I have not experienced any crashes of RetroArch that could be associated with FinalBurn Neo. It seems that the buggy times of the RetroArch/FinalBurn Neo combo on Macs is a matter of the past.
What about the other Arcade Cores?
Currently FinalBurn Neo clearly has the edge over all other Arcade cores in RetroArch.
- FB Alpha Cores: I do not touch them, they give no edge over FBNeo, seem to be for older machines
- MAME 2000: I do not touch them, this is a 20 years old MAME for low-end computers
- MAME 2003: That’s a fallback core for games that do not run in FBNeo. Very little use, however. The "Plus" version of 2003 might be worth a try as it implements further changes, but it can be very buggy (the plus version stabilized on Silicon Macs over the past few months a bit). Supports the Run-Ahead feature as a big plus.
- MAME 2010: No support of Silicon Macs, immediately crashes. Another fallback core for games that do not run in FBNeo. Not as stable as MAME 2003, however. Does however not support the Run-Ahead feature.
- MAME current: Significantly improved over recent months in MacOS and is both stable and performant. Koko-aio shaders now work identically to FinalBurn Neo. It's also a nice fallback core for games that FinalBurn Neo does not support. Probably most precise emulation. Drawbacks are no RetroAchivement support and long loading times.
Hi Estefan, thanks for this. I have completed my move from OpenEmu to RetroArch for all my console and arcade emulation requirements, so this guide was very useful in enabling that. While I can get Final Burn Neo up and running with all the recommended settings, its weakness appears to be a lack of compatibility with some arcade games. I had to revert to the MAME core for quite a few games, not even obscure ones, because Final Burn reports the ROM sets as unknown. I cannot get compatible ROMs for these because they do not appear in the “official” sets. A good example is Indiana Jones and the Temple of Doom. I would not know where to start in terms of trying to convert a ROM set to make it compatible with Final Burn.
ReplyDeleteHi Adam, yes, that's unfortunately a certain disadvantage of FinalBurn Neo, that MAME clearly supports more games. Actually Indiana Jones is a rather more prominent example that I was not aware of so far. You can only switch to a different RetroArch core, unfortunatley, and hope that FB Neo will support it in future releases.
DeleteSo what core?
- In my use cases on Apple Silicon, so far only very old games, such as Boot Hill and Astro Fighters. In these cases, I currently revert to MAME2003 or MAME2003 plus, as MAME current is too buggy at the moment (yes, it can crash) and also has a different rotation logic than the other cores.
- On Intel Macs, you can also look at MAME 2010, it has been a favourite in old times, but the Apple Silicon core crashes for me. I just did a test on an Intel Mac, it it seems to work. Maybe MAME (current) is more reliable on Intel Macs, I did not test recently. An advantage of MAME (current) seems to be that Runahead/Preemptive Frames work. But I am really unsure about this Core in RetroArch.
Fortunately for me (at least), it is a very small number of games that FB Neo currently does not support. Hope that this is not an overly large issue for you.
Thanks Estefan. Actually, I have found that the current MAME core works very well on my Intel Mac. The run-ahead/preemptive frame settings appear to work flawlessly. So, I am quite happy to standardize on MAME for now, and consider FinalBurn for the few games that may require it. To be honest, I have not noticed a perceptible scrolling difference between FinalBurn forced 60hz and MAME. Perhaps my favorite games just play nice with 60hz. Anyway, I have a Dough Spectrum 144hz variable refresh rate monitor on the way, so I hope the issue would become a moot point for me at that stage. :-)
DeleteI find "Preemptive Frames" enabled makes the picture in fbneo jittery.
ReplyDeleteHard to see at - 1 but at - 2 frames clearly at cave bullet hell games.
I'm back to "run ahead" .
This is a guide for setting every optional setting in the app but absolutely useless for getting someone started on basic functionality like loading a ROM (which often has to be done manually). Basically a guide for everything but that.
ReplyDeleteYes, as the title says, this is about setting up RetroArch, nut using it. For using the app, it is much easier to look some videos on YouTube, or just go to the official RetroArch docs.
ReplyDelete