Go to my Introduction for download links of MAME for MacOSX.
Installing means extracting the zip File. Consider installing MAME in your User directory, but not the Applications directory. This allows easier updating and keeping separate versions of MAME next to each other.
Installing MAME Data
In its working directory, MAME by default provides for a predefined path structure for these data:

If you move some of these data to another place, there can be consequences. I experienced this with the BGFX configuration because I am having artwork at a different place (see separate post). So in general, it is probably the best thing to keep everything at that place. So when moving to a new version of MAME, be sure that you move these data as well.
Apart from these data, there are of course a lot of further MAME data, which you either place into the MAME working directory or to a different folder. Some of these folders have to be configured during first start of QMC2 (see below).
Installing QMC2
Go to my Introduction for download links of QMC2 for MacOSX and SDL2. QMC2 installs via a package. You may need to temporarily turn off the Mac Gate Keeper. SDL2 must be installed first.
If you want to compile QMC2 from source, look into this post.
During your first run of QMC2, you must link the frontend to the MAME executable, its directory and further specific directories of MAME Data. At a later stage, this can be found here: Tools/Options/Emulator/Global Configuration/Search Paths
- directory of ROM files, the games
- HASH directory of MESS (see my MESS post)
- directory for Samples, sound effects for some games
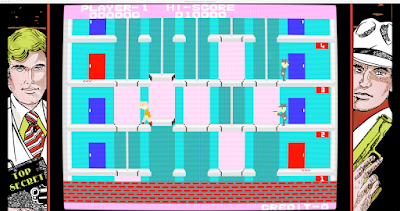
- directory for Artworks, in-game graphics (see title screenshot)
The four paths mentioned are probably the most important ones for the basic setup, with them MAME should be workable. If MAME now does not work something is wrong with the executable, the ROM files or these paths.
The Business Case for QMC2
Although I did quite some experimenting with the built-in UI of MAME, which is actually nice (see this post), I returned to QMC2 again. It seems to me that QMC2 keeps your data in order when switching MAME versions. So I recommend that you take the extra mile and look into QMC2 as your graphical frontend.
First Basic Setup of MAME/QMC2 (Alphabetic Order)
Artwork: For activating the artwork as shown in the title, you need to consider the following:
Have MAME In Game Artwork available, e.g. by downloading from http://mrdo.mameworld.info/mame_artwork.php
The MAME artpath in the Search paths as shown above, must point to the directory containing M.A.M.E. Artwork. WARNING: If your artpath is outside of the MAME working directory, be sure that all the artwork contained in the default MAME artpath is also copied to the other directory. Otherwise you run into deep troubles with BGFX, for example (as explained here).
Configure Crop vs No Crop: Although the artwork bezels are beautiful, I still prefer the actual game to be full screen. So I set crop to yes in the QMC2 setup: Tools/Options/Emulator/Artwork/Artwork crop -> Yes
Change Crop vs No Crop in MAME live: in M.A.M.E. press Tab and to to Video Options, there choose between Full and Cropped, as shown below (freehand photos)
 |
| Full Size Artwork makes game screen much smaller |
 |
| Cropped Artwork just fills the black space of the monitor, which I prefer |
Enable Autosave in QMC2: Tools/Options/Emulator/Global Configuration/State playback/autosave on (1)
Change Autosave Directory in QMC2: Tools/Options/Emulator/Global Configuration/Output directories/state_directory
Migrating States? States are saved in the Sta directory of the M.A.M.E. working directory. If you move these directories to the working directory of your new M.A.M.E. binary, states sometimes continue to work. In case of MAME 172, however, it seems that none of the old states work (error: invalid state header), so again a new start with highscores.Cheats: I hardly use cheats, but sometimes they are just helpful or I am just curious about existing cheats. There are two settings to configure in QMC2
Enable Cheats: Tools/Options/Emulator/Global Configuration/Miscellaneous/Cheats On (1)
Cheat Directory: Tools/Options/Emulator/Global Configuration/Search paths/cheatpath
Place the Cheats.7z file into that directory, and from now on, when pressing Tab in a game, you have the Cheat options available.
Note: Some NeoGeo ganes, such as Metal Slug 1 and 2, crash without warning when Cheats are enabled. Be sure to individually disable Cheats for such games. (Update October 2017: The crashes do no longer occur, at least since MAME 0.191, so it is safe to turn on cheats in both games)Highscore: Starting with MAME 0.170, saving highscores via a LUA plugin became a serious contender. Now as I write this update as of MAME 0.177, the highscore plugin becomes quite stable and configurable in QMC2 as follows:
Options/Emulator/Miscellaneous/plugins - enabled
Options/Emulator/Miscellaneous/plugin - hiscoreWith these two options enabled, you should find your highscores in the hi directory of MAME recorded. The solution looks highly promising, until now all games recorded highscores properly. And these highscores also seem to be portable to future versions of MAME - so be sure to port the hi directory to a new MAME Version.
Windowed Mode: Especially during configuration, I prefer the Windowed Mode over Fullscreen, it just gives you another chance to exit the game if something goes wrong.
In QMC2: Tools/Options/Emulator/Global Configuration/Video/Window - Enabled
Fixed Resolution for Artwork: If you use in-game Artwork, you need to define a fixed window size, otherwise you would see no Artwork at startup of the game. Since I have only one monitor, I define resolution for all screens, and after some trials, 3000x1600 provides a nice result in my iMac - it's all about your screen resolution, so you must try out by yourself on other screens.
For some reason, this setting gives me even more background artwork than in Fullscreen:
 |
| More artwork in the window than in fullscreen (click to enlarge) |


